Beyond the Clouds
Making a Floating Island - How to Use Maya 2024's Boolean and Retopologize Tools


Hi everyone! This week I'll be walking you through how I modeled this floating island in Maya 2024 and how to use the Boolean and Retopologize Tools.
If you'd like to see a full timelapse of the modeling and texturing process, check out this YouTube video that I created: Floating Island Timelapse. Feel free to leave a comment or ask me any questions there as well!
Note: The images for steps 4 and 5 are not showing, but they are attached and should listed at the top of this post.
Making a 3D model of a floating island in Maya using the Boolean Tool and Retopologize Tool.
Step 1: Create a normal cube and make the bottom face smaller.
To start, just create a normal cube using the cube tool in the top left. For my purposes, I changed the scale to be (100,100,100), but this isn't required to create the effect that we're looking to achieve. Grab the bottom face and drag it in. From here, feel free to add a couple of edges and drag in the sides to make it not super boxy, but if you're going for a very low-poly look, you may just want to stop here. I added three edges on each side to create 16 faces on the top, then used the vertex tool to select specific ones and move them until I got the shape I wanted. The bottom of your island should not matter at the end of this step, so don't worry about making it more circular/less angular at this stage.
Step 2: Create a bunch of cubes/shapes that you want to be chunks taken out of the island.
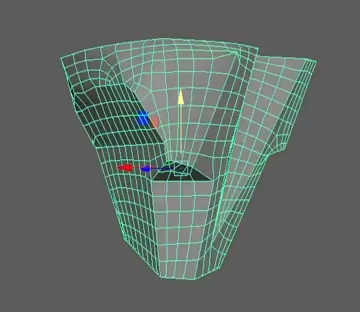
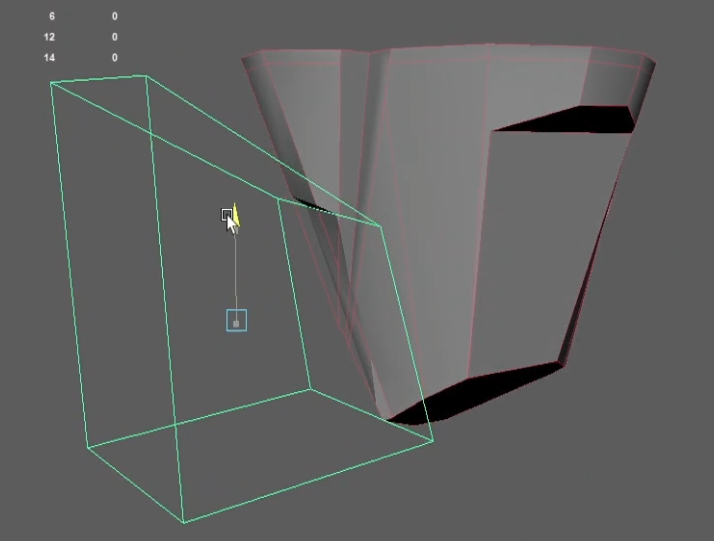
For this, what you're going to do is create cube and rescale them to be in various shapes and push them into the bottom of the cube or anywhere where you'd like to take a chunk out. I created around 6-8 chunks to take out. Don't worry about them being their final position, you'll be able to change their position in the next step! Your shape will probably look something like this:
If you've been modeling for a while and haven't played much with the boolean tool, this likely feels wrong. Trust me, trust the process! It's about to look cool! Your shapes should be overlapping for this stage.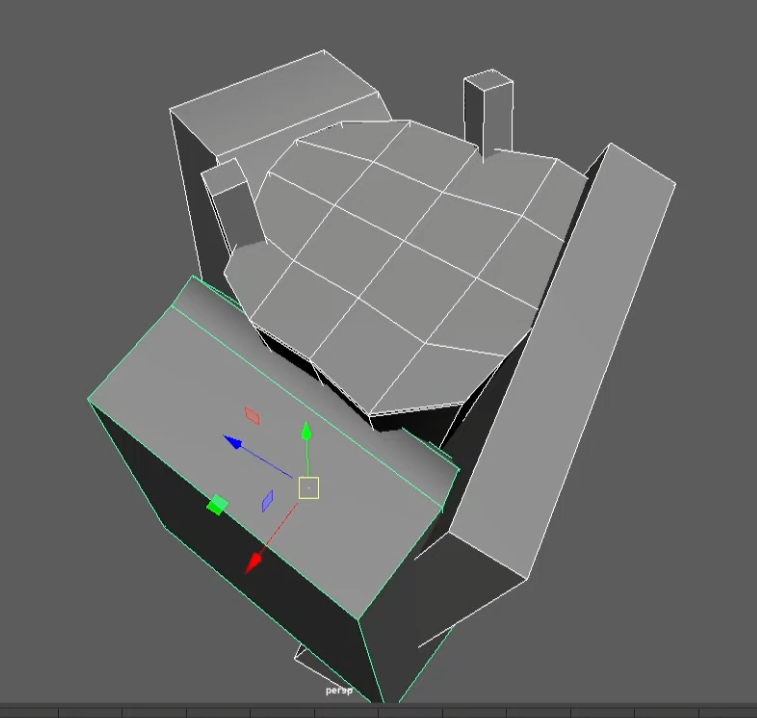
Important note: Your main island should be the highest mesh in your hierarchy before continuing to the next step! If it isn't, you can hover over it and click and drag using middle mouse button to take it to the top (don't worry about the cameras). If for some reason you can't get this step to work or your mouse doesn't have a middle mouse button, you'll be able to rearrange it in the next step, I just find it significantly less confusing to make sure its on top of the hierarchy at this stage.
Step 3: The Amazing Boolean Tool.
Now to the fun part. Select all your shapes using Shift+click. Include the main island piece as well as any piece you want to cut out of it. Select the Boolean tool from the Poly Modeling bar.
It is this tool:
If you hover over it, it should say "Difference [A-B]" with some more instructions. This is why it's important to have your main island at the top of the hierarchy. If you weren't able to change it to the top of the hierarchy, you should be able to change it in the menu that comes up to the right once you've selected the Boolean tool. Here you can drag and drop which pieces you want where. You can also select individual pieces in the main hierarchy and change their size, location, scale, etc. while still in the Boolean menu.
Once you're happy with how these pieces cut out, you can click into the new shape that is created in the hierarchy and delete your history. This will solidify all your changes and make your cuts final.
You can repeat steps 2 and 3 as many times as you like until your shape is cut and shaped the way you want it to be. Do not worry about topology at this point, we're fixing that in the next step.
Step 4: Retopologizing.
Once you are happy with how your shape looks, its time to retopologize it. You could do this manually, or you could use Maya 2024 (and newer)'s retopologize tool.
Before continuing, do a Save As to save your project to a NEW FILE. This is VERY important.
Since the Retopologize tool is new to Maya 2024 (and because it is so computationally heavy in comparison to doing it manually), there is a comparatively high chance that Maya will crash if the settings you choose can not be handled by your computer or do not make sense geometrically. (When I say high chance, I mean I've had it crash maybe 5 times total when using this tool, but that's high compared to some of the other tools. Don't be scared, but just save your work as a new file, trust me.) It's good practice to keep multiple copies of the same project at different stages so that you have one to go back to if the file corrupts for any reason, so its good to start getting into this habit as soon as possible.
First what we're going to want to do is see how many faces you're already working with. This will make retypologizing easier.
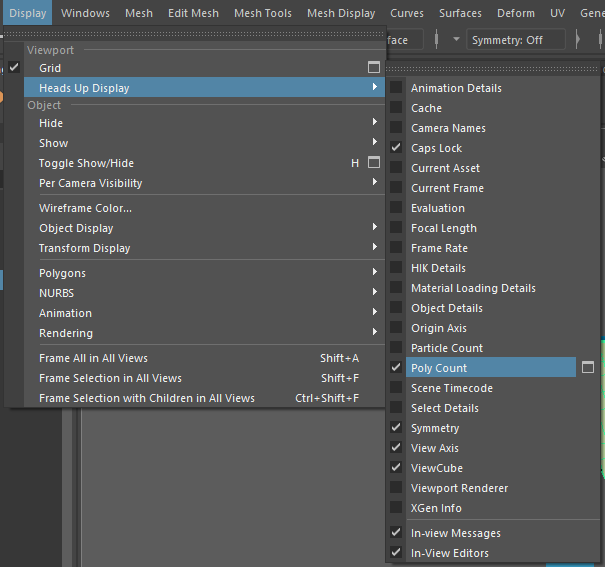
To do that, go to Display > Heads Up Display > Poly Count. You're going to want to look at the number of faces.
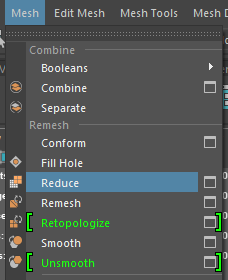
Once you can see how many faces you already have, its time to retopologize. To find it, select your island and head to Mesh>Retopologize. Make sure to hit the box on the right side so that more options open:
This is the options panel that comes up. Your main focus is going to be on that Target Face Count section. To start with, I find the most success if I at least double my current face count and put that for the Target Face Count. At first it may seem like a lot, but we'll be able to reduce it down here in the next step. Keep in mind as well that when taking your model into different programs, your model will need to have quads or triangles for every shape and can cause major issues if this is not the case. For our purposes, we want quads since we're using Unity.
For some of these other settings, it may be worth playing around with/taking a couple of tries before you get the results you want. Personally, I believe I found the most success in unchecking "Preserve Hard Edges" and instead checked on "Preserve Edges by angle" and raised the number a bit to somewhere around 60. I did have to retopologize maybe 3-4 times before I was completely happy with the result I got.
Step 5: Reduce
We're almost done with the geometry! From here, the last step is to use the Reduce tool to get rid of any extra faces that may be unnecessary. To do that, begin by deleting your history.
For reference, you can do that by either selecting your mesh and going to Edit > Delete All By Type > History, OR just click this button on the Poly Modeling tab:
Once your history is deleted and you are only left with the mesh for your island, we're going to reduce the faces on our mesh.
You can find that tool either in Mesh > Reduce, or by clicking this button in the Poly Modeling tab:
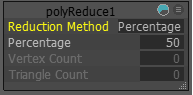
You could pull up the options tab, but I find it more convenient to just continue without it. This box will come up if you don't select to open the options tab:
The percentage will most likely be small because most of your edges are most likely needed for the structural integrity of your geometry, but try to get it to be the highest percentage it can be without majorly changing the overall look.
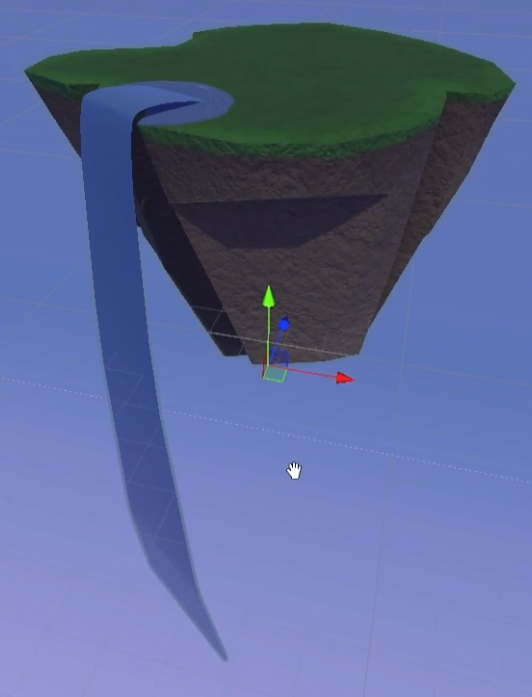
From here, you're all done with the geometry! All you have to do now is UV and Texture your mesh and you've got a floating island!
If you'd like to see a timelapse of the entire creation of the model including modeling, UVing, and Texturing, check out my YouTube video showing the entire process. This is sped up a significant amount, and doesn't show any parts that I had to redo because of crashes or something related, and overall took me around 4-5 hours total.
If you have any questions, feel free to comment them here or on my YouTube video and I'll keep an eye out!
Thank you for reading! Happy devving!
Leave a comment
Log in with itch.io to leave a comment.